Installation on macOS
NOTE: PlexRipper is currently supported on ARM64 architecture! See: #363
Installing Docker Desktop
You can skip this step if you already have Docker Desktop installed on your Mac machine.
To install Docker Desktop on Mac, you can follow these steps:
- Go to the Docker website: https://www.docker.com/products/docker-desktop
- Click on the "Get Docker Desktop for Mac" button. This will start the download of the Docker Desktop installer.
- Once the download is complete, open the Docker.dmg file. It should be located in your Downloads folder.
- Drag and drop the Docker.app icon into the Applications folder to install Docker Desktop.
- Open the Applications folder and double-click on the Docker.app icon to launch Docker Desktop for the first time.
- You'll see a prompt asking for permission to install the Docker Desktop components. Enter your macOS password and click "OK".
- Docker Desktop will start the installation process. It may take a few minutes to complete.
- After the installation is finished, you'll see the Docker icon in your menu bar. It looks like a whale. Click on the Docker icon to open the Docker menu.
- From the Docker menu, select "Preferences" to customize Docker Desktop settings.
- In the Preferences window, you can adjust various settings such as the number of CPUs and amount of memory allocated to Docker containers. You can also configure network settings and enable/disable features like automatic updates.
- Once you've configured your preferences, close the Preferences window.
- Docker Desktop is now installed and running on your Mac. You can verify it by opening a terminal and running the following command:
docker version
If Docker is properly installed, you should see the version information printed in the terminal.
Installing PlexRipper with Docker Desktop

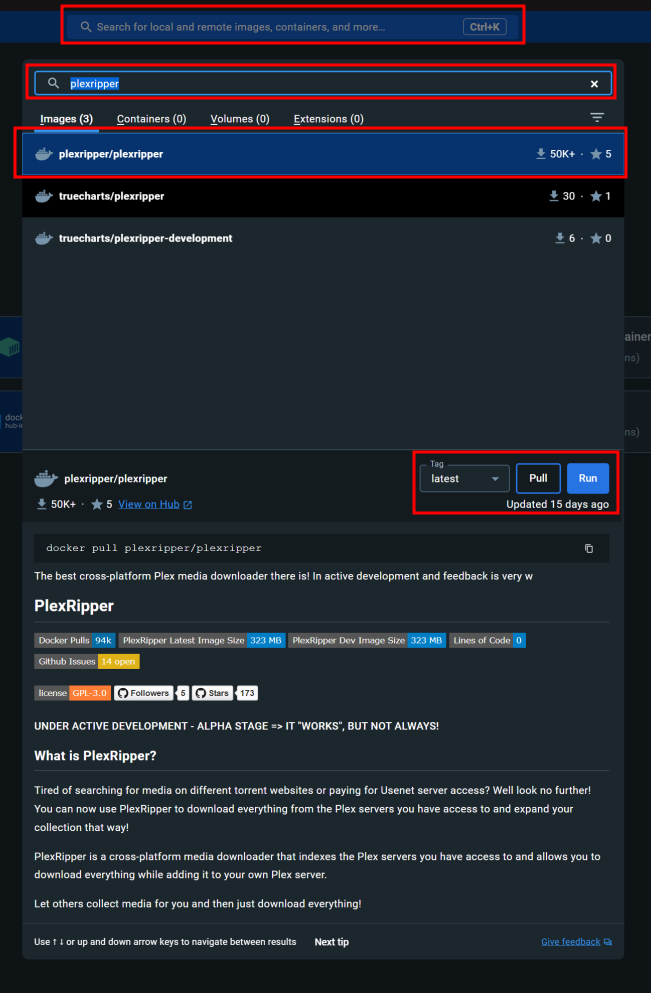
- Open Docker Desktop and click on the search bar at the top
- Search for
plexripperand click on theplexripper/plexripperimage - You can change the tag to
latestif you want to use the latest version of PlexRipper, ordevif you want to use the latest development version of PlexRipper - Next, click on the
Runbutton
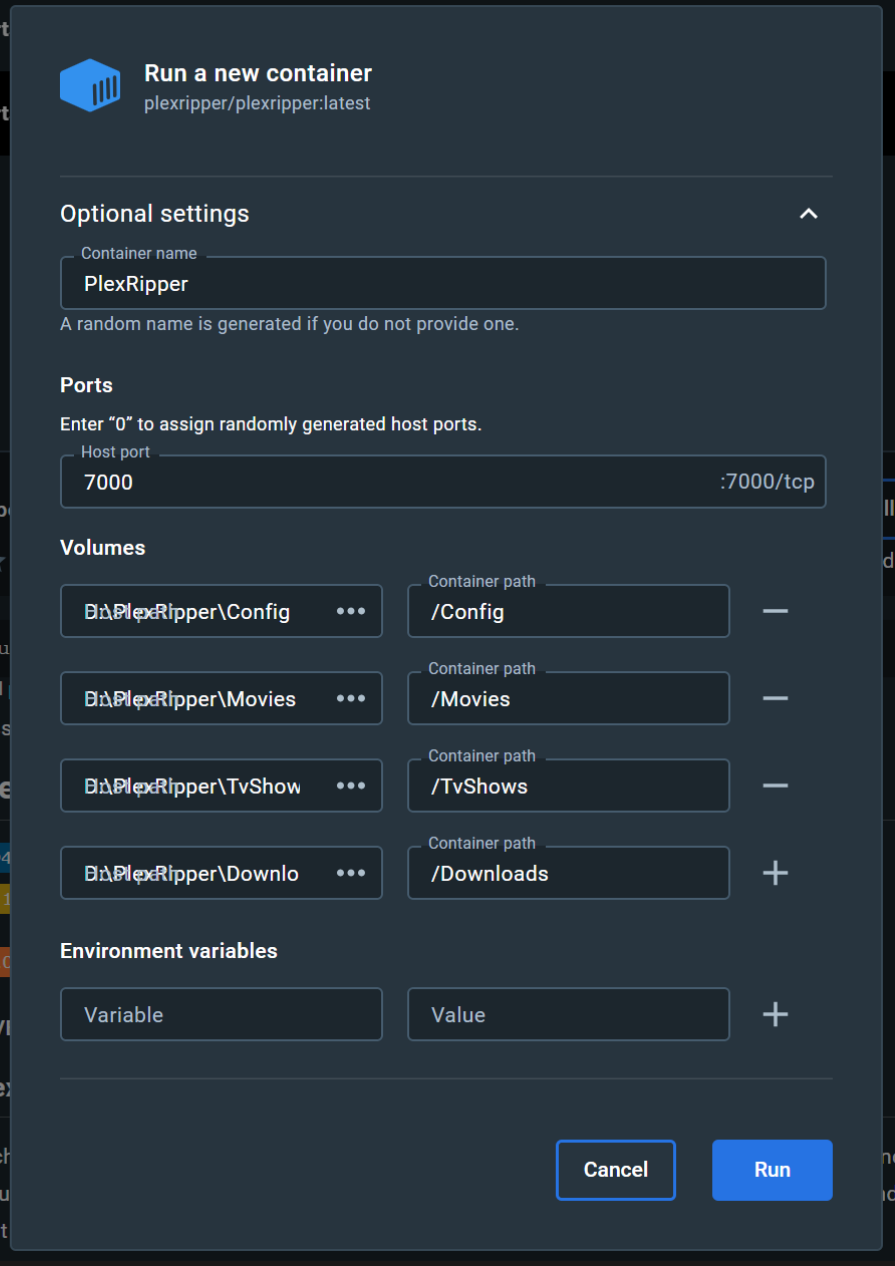
- A new window will open where you can configure the container, click on
Optional Settingsto expand the options. - Ensure you have the following filled in:
Name: PlexRipper, this is the name of the containerHost port: 7000, this is the port you will use to access PlexRipper in the browserVolumes: these are the locations where PlexRipper will store its data. The left box is for the folder on your computer, the right box is for the folder inside the container. You can change the left box to any folder on your computer, but the right box should stay the same./Config: this is where PlexRipper will store its configuration, logs and database/Movies: this is where PlexRipper will move the movies after it has finished downloading them/TvShows: this is where PlexRipper will move the tv-shows after it has finished downloading them/Downloads: this is where PlexRipper will temporarily store the media while downloading
- Once everything is filled in, press
Runat the bottom of the window
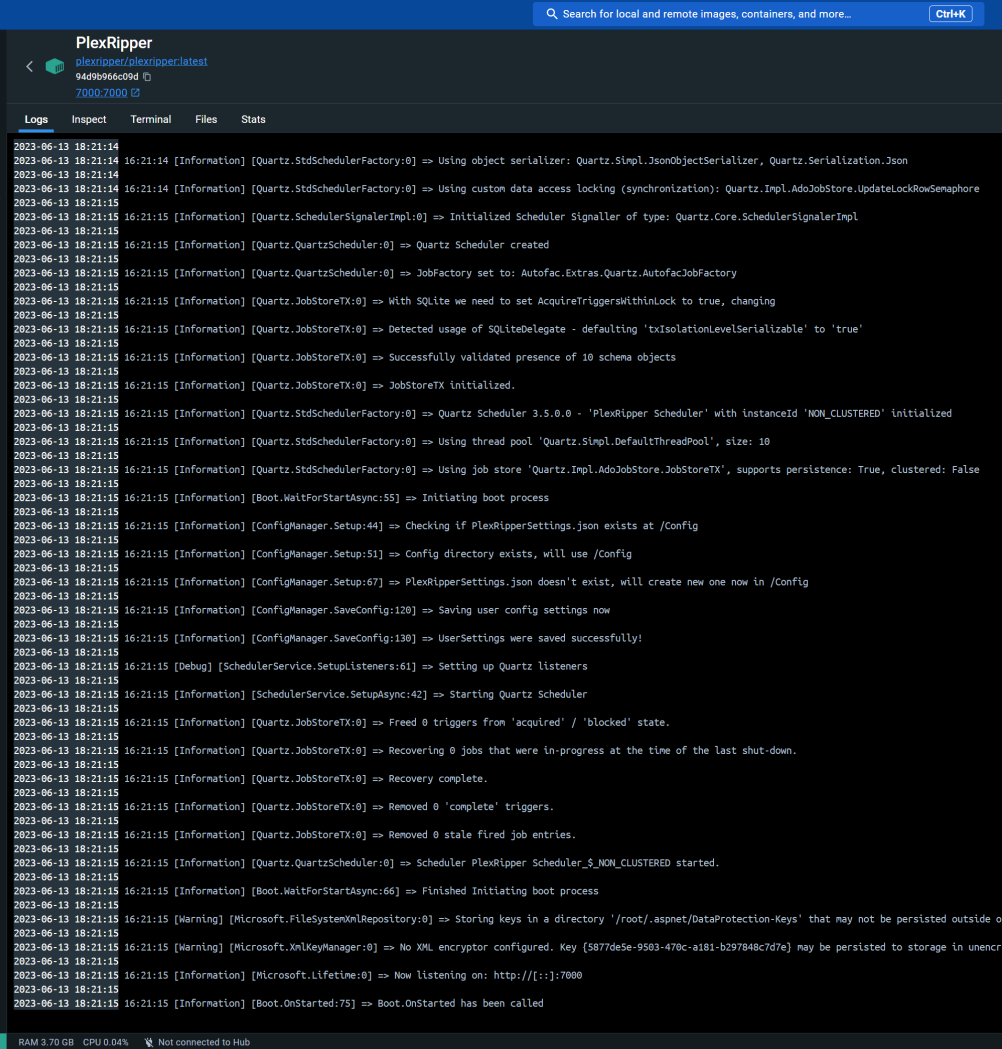
- If all went well you should see the PlexRipper booting up in the Docker Desktop window
- Final step, go to your browser and navigate to http://localhost:7000, and you should see PlexRipper working!

