Installation on Windows
Installing Docker Desktop
You can skip this step if you already have Docker Desktop installed on your Windows machine.
To install Docker Desktop on Windows, you can follow these steps:
- Visit the Docker Desktop download page for Windows at: https://www.docker.com/products/docker-desktop
- Click on the "Download for Windows" button to start the download. Make sure to download the stable version suitable for your Windows operating system.
- Once the download is complete, locate the Docker Desktop installer file (typically named
Docker Desktop Installer.exe) in your downloads folder or the designated location. - Double-click on the installer file to launch the Docker Desktop installation wizard.
- The installation wizard will guide you through the setup process.
- Choose the installation options according to your preference. By default, all options are selected, including "Install required Windows components for WSL 2."
- During the installation, you might be prompted to enable Hyper-V and Virtual Machine Platform features if they are not already enabled on your system. Follow the on-screen instructions to enable these features.
- Once the installation is complete, you may be prompted to sign in to Docker Hub or create a Docker ID. You can choose to sign in or skip this step.
- Docker Desktop will start automatically after the installation is finished. You should see the Docker Desktop icon in the system tray (lower-right corner of the screen).
- Docker Desktop will take a few moments to initialize and start the Docker daemon. Once it's ready, the Docker Desktop icon in the system tray will indicate that Docker is running.
- You can right-click on the Docker Desktop icon in the system tray to access various Docker features and options.
- To verify that Docker is installed and running correctly, open a command prompt or PowerShell window and run the following command:
docker version. It should display the version information of Docker CLI and Docker Server.
That's it! Docker Desktop is now installed and ready to use on your Windows machine. You can start using Docker commands to manage containers and images, and run Dockerized applications.
Installing PlexRipper with Docker Desktop

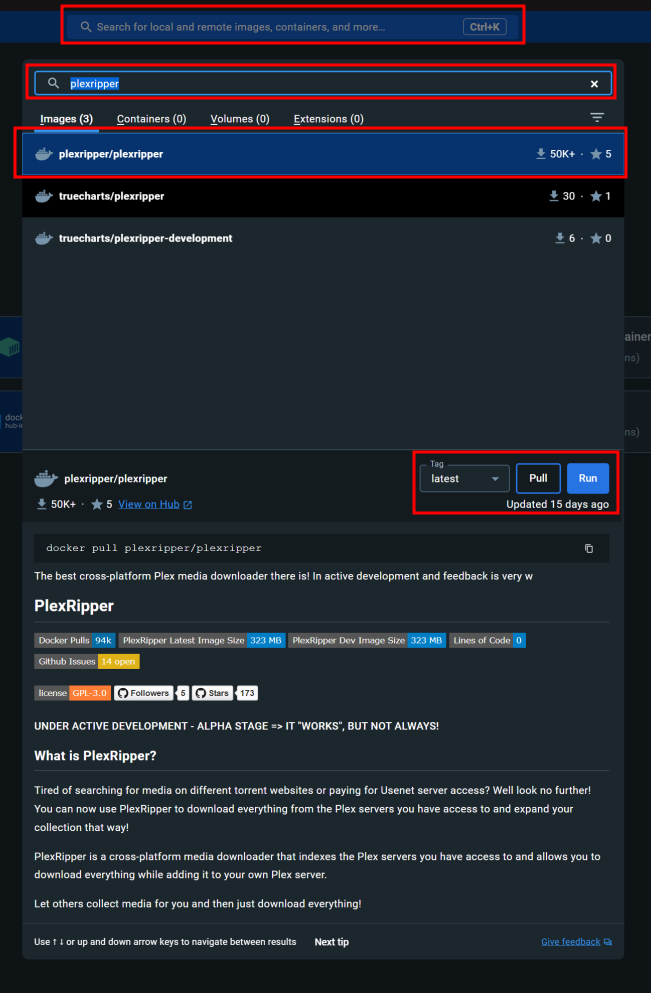
- Open Docker Desktop and click on the search bar at the top
- Search for
plexripperand click on theplexripper/plexripperimage - You can change the tag to
latestif you want to use the latest version of PlexRipper, ordevif you want to use the latest development version of PlexRipper - Next, click on the
Runbutton
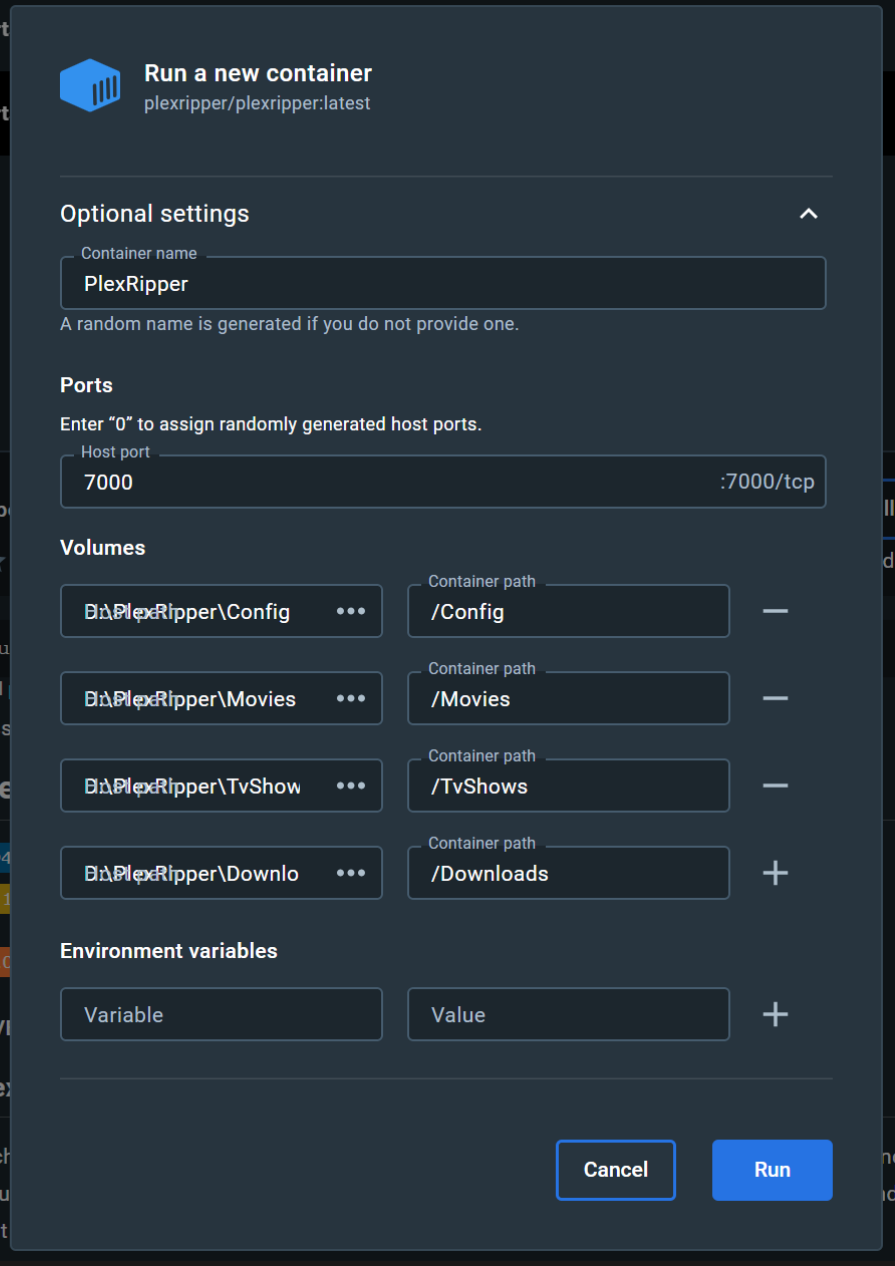
- A new window will open where you can configure the container, click on
Optional Settingsto expand the options. - Ensure you have the following filled in:
Name: PlexRipper, this is the name of the containerHost port: 7000, this is the port you will use to access PlexRipper in the browserVolumes: these are the locations where PlexRipper will store its data. The left box is for the folder on your computer, the right box is for the folder inside the container. You can change the left box to any folder on your computer, but the right box should stay the same./Config: this is where PlexRipper will store its configuration, logs and database/Movies: this is where PlexRipper will move the movies after it has finished downloading them/TvShows: this is where PlexRipper will move the tv-shows after it has finished downloading them/Downloads: this is where PlexRipper will temporarily store the media while downloading
- Once everything is filled in, press
Runat the bottom of the window
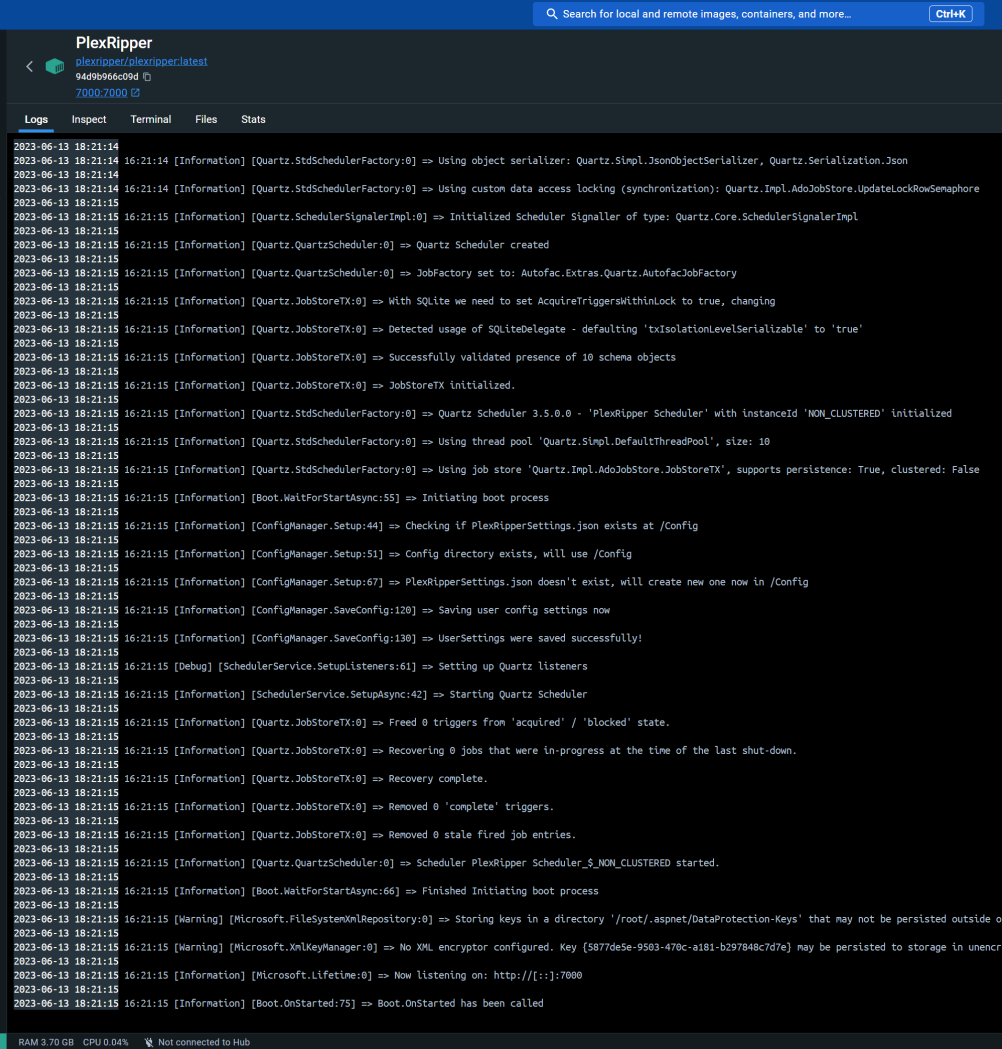
- If all went well you should see the PlexRipper booting up in the Docker Desktop window
- Final step, go to your browser and navigate to http://localhost:7000, and you should see PlexRipper working!
Troubleshooting
If you encounter issues downloading a file, you may need to check your permissions to the mounts within the Docker container. To change the mount permissions:
- Open Docker
- Locate the PlexRipper Container from the Container view list
- Click PlexRipper
- From the available tabs at the top, click Exec
This will present you with a shell window.
- Run the following commands (copy and paste)
chmod -R 777 /Config
chmod -R 777 /Downloads
chmod -R 777 /Movies
chmod -R 777 /TvShows
- This will permit Docker to write to your Windows mounts (assuming you have successfully mounted them).

